calligraphy ink techniques: exploring colors, blending, and effects
Calligraphy is the art of beautiful writing, and ink plays a crucial role in creating stunning calligraphic pieces. In this article, we will explore various techniques for using ink in calligraphy to produce different colors, blending effects, and unique textures. Whether you are a beginner or an experienced lettering artist, these techniques will help elevate your calligraphy to the next level.
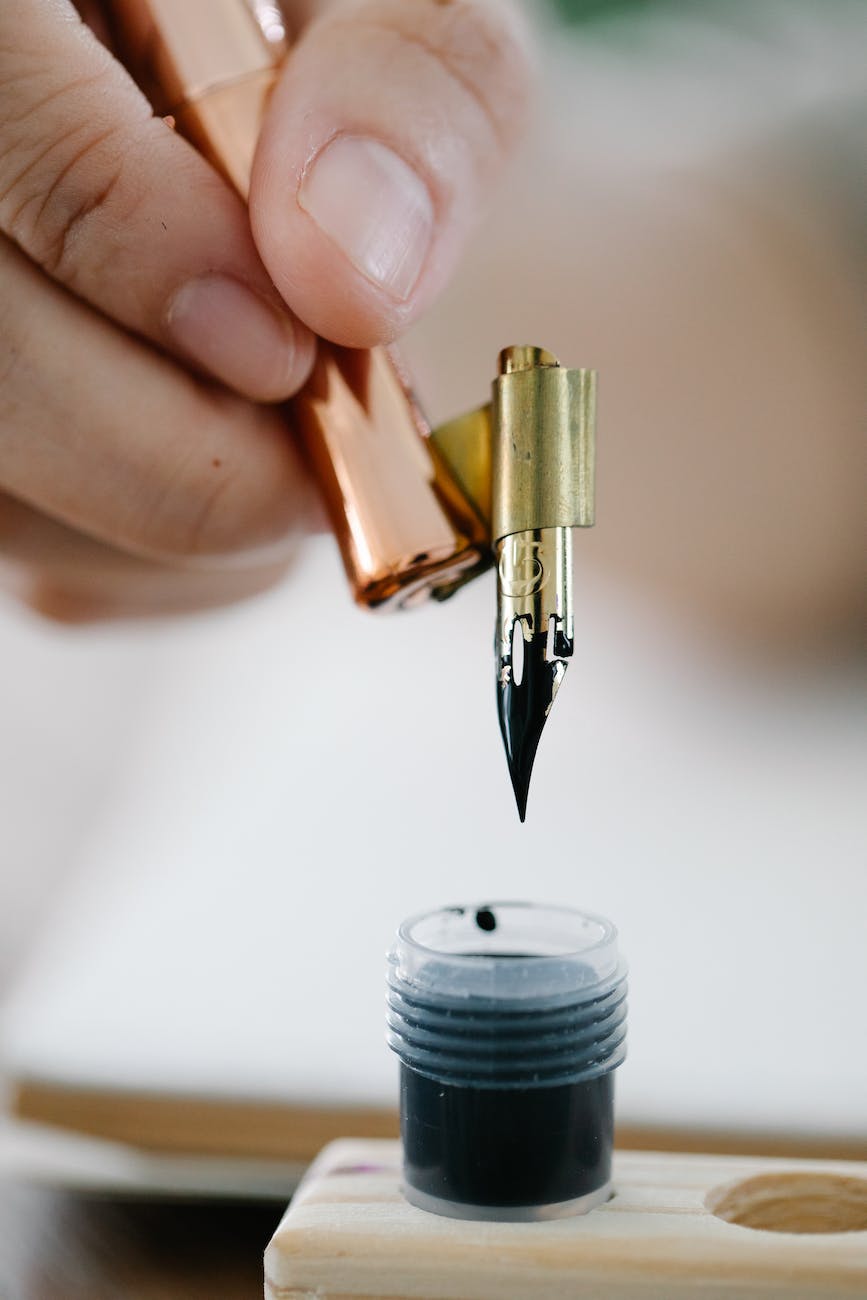
1. How to Choose the Right Pen for Calligraphy
A key factor in achieving beautiful calligraphy is choosing the right pen. There are various types of calligraphy pens available, each with its own unique characteristics and writing styles. Understanding the different calligraphy pens is essential for selecting the one that suits your preferences and desired lettering style.
1.1. Understanding Different Calligraphy Pens
In the world of calligraphy, two popular types of pens are dip pens and brush pens. Dip pens consist of a nib that can be inserted into an inkwell, allowing for precise control over the flow of ink. Brush pens, on the other hand, have a flexible tip that mimics the strokes of a brush, making them ideal for creating a variety of lettering styles.
1.2. Tips for Choosing the Best Pen for Hand Lettering
When choosing a pen for hand lettering, consider factors such as the size of the nib, the flexibility of the tip, and the thickness of the lines. Experiment with different pens to find the one that feels comfortable in your hand and allows you to achieve the desired effects in your lettering.
1.3. Comparing Dip Pens and Brush Pens
Dip pens offer more control and precision, making them suitable for intricate designs and detailed lettering. Brush pens, on the other hand, provide a looser and more expressive style, perfect for creating bold and organic letterforms. Both pens have their own advantages, and it ultimately comes down to personal preference and the desired outcome.
2. Mastering Color Blending in Watercolor Calligraphy
Watercolor calligraphy combines the elegance of calligraphy with the vibrant colors of watercolor. Blending colors in watercolor calligraphy can create beautiful gradient effects and add depth to your lettering. Here are some techniques to help you master color blending in watercolor calligraphy:
2.1. Step-by-Step Tutorial for Blending Two Colors
Start by selecting two colors that complement each other. Apply the lighter color to the top of the letter and the darker color to the bottom. Using a clean, wet brush, gently blend the colors together, using light, sweeping strokes. Continue blending until you achieve a smooth transition between the two colors.
2.2. Tips for Creating Gradient Effects with Watercolor
To create gradient effects with watercolor, start by applying a wash of the lighter color across the entire letter. Then, using a brush loaded with the darker color, apply a concentrated strip of color along the bottom edge of the letter. Use a clean, damp brush to blend the colors together, working from the darker section towards the lighter area.
2.3. Exploring Different Color Combinations in Calligraphy
Don’t be afraid to experiment with different color combinations in your calligraphy. Mixing complementary colors, analogous colors, or even contrasting colors can create unique and eye-catching effects in your lettering. Take the time to explore various color palettes and discover the combinations that resonate with your artistic style.
3. Techniques for Creating Stunning Effects with Ink
Ink offers a wide range of possibilities for creating stunning effects in calligraphy. By exploring different techniques and mediums, you can add texture, depth, and dimension to your lettering. Here are some techniques for creating stunning effects with ink:
3.1. Using a Dip Pen to Create Texture and Stroke Variation
A dip pen is a versatile tool that allows you to create texture and stroke variation in your lettering. Experiment with different nib sizes and pressure to achieve thin, delicate lines or bold, expressive strokes. By varying the angle and pressure of your pen, you can add depth and interest to your calligraphic compositions.
3.2. Experimenting with Different Ink Mediums in Calligraphy
In addition to traditional ink, there are various ink mediums available for calligraphy. Metallic inks, colored inks, and even acrylic inks can add a touch of uniqueness to your lettering. Explore different ink mediums and discover the effects they can create in your calligraphic compositions.
3.3. Adding Depth and Dimension to Lettering with Ink Effects
Ink effects such as splatters, washes, and stippling can add depth and dimension to your lettering. Splattering ink onto your paper creates a dynamic and energetic effect, while washes can be used to create soft and dreamy backgrounds. Stippling, which involves creating patterns using small dots, adds texture and visual interest to your calligraphic pieces.
4. How to Get Started with Ink Blending for Beginners
If you are new to ink blending, getting started can be both exciting and overwhelming. However, with the right tools and techniques, you can quickly learn how to blend colors and create stunning effects in your calligraphy. Here’s how to get started with ink blending for beginners:
4.1. Essential Tools and Techniques for Blending Colors
Before you begin blending colors, make sure you have the essential tools, such as water-based inks, a palette, brushes, and watercolor paper. Start by applying the lighter color to the desired area, then use a clean, damp brush to pick up the darker color and gently blend it into the lighter color. Practice different blending techniques, such as wet-on-wet or wet-on-dry, to achieve different effects.
4.2. Tips for Using Water-Based Inks in Blending
Water-based inks are ideal for blending as they are easy to work with and can be easily diluted to achieve desired color variations. When blending with water-based inks, it is important to work quickly as the ink tends to dry faster. Keep a paper towel handy to blot excess moisture and prevent colors from merging too much.
4.3. Step-by-Step Guide to Blending Colors in Calligraphy
To blend colors in calligraphy, start by loading your brush with the lighter color and apply it to the desired area. Rinse your brush and load it with the darker color, then touch the tip of the brush to the area where the two colors meet. Use gentle strokes to blend the colors together, working from the lighter area towards the darker section. Continue blending until you achieve a smooth transition.
5. Exploring Advanced Techniques in Blending and Effects
Once you have mastered the basics of ink blending and are comfortable with creating different effects in your calligraphy, you can start exploring more advanced techniques. These techniques will allow you to create truly stunning and unique compositions. Here are a few advanced techniques to explore:
5.1. Creating Beautiful Backgrounds with Blended Colors
Blend multiple colors together to create beautiful backgrounds for your calligraphy. Experiment with different color combinations and blending techniques to achieve the desired effect. Whether you want a soft and subtle background or a vibrant and energetic one, blending colors can help you achieve the desired mood and atmosphere in your calligraphic pieces.
5.2. Using a Palette Knife to Saturate Colors and Create Texture
A palette knife can be a versatile tool for creating stunning effects in calligraphy. Dip the palette knife in ink and apply it to your paper to create textured strokes and dynamic patterns. You can use the palette knife to saturate colors, create bold strokes, or even scrape away layers of ink to reveal underlying colors or textures.
5.3. Tips for Blending Colors to Create a Brush Lettering Look
If you enjoy the look of brush lettering but prefer the control of a pen, you can use ink blending techniques to achieve a brush lettering look. Start by blending two or more colors together using a wet-on-wet technique. Load your pen with the blended ink and use it to create brush-like strokes in your lettering. This technique allows you to combine the precision of a pen with the expressive nature of brush lettering.
By exploring various calligraphy ink techniques, you can unlock your creativity and enhance your calligraphic compositions. Whether you are a beginner or an experienced lettering artist, these techniques will provide you with new tools and possibilities to create stunning lettering and calligraphy pieces. So grab your pens, inks, and paper, and