the history of pyrography: tracing the origins of this timeless wood burning art
Pyrography, also known as wood burning, is an ancient art form that involves using heat to burn designs onto various types of wood surfaces. The term “pyrography” is derived from the Greek words “pyro” meaning “fire” and “graphy” meaning “writing.” This unique craft has a long and rich history that dates back centuries, showcasing its enduring popularity and timeless appeal.
What is Pyrography and How Does it Work?
The Origins of Pyrography
The origins of pyrography can be traced back to ancient Egypt and China, where early practitioners used heated metal rods to decorate wooden objects. The art form gained popularity during the Victorian era, with intricate wood burned designs adorning various items such as furniture, boxes, and even musical instruments.
Tools and Supplies Needed for Pyrography
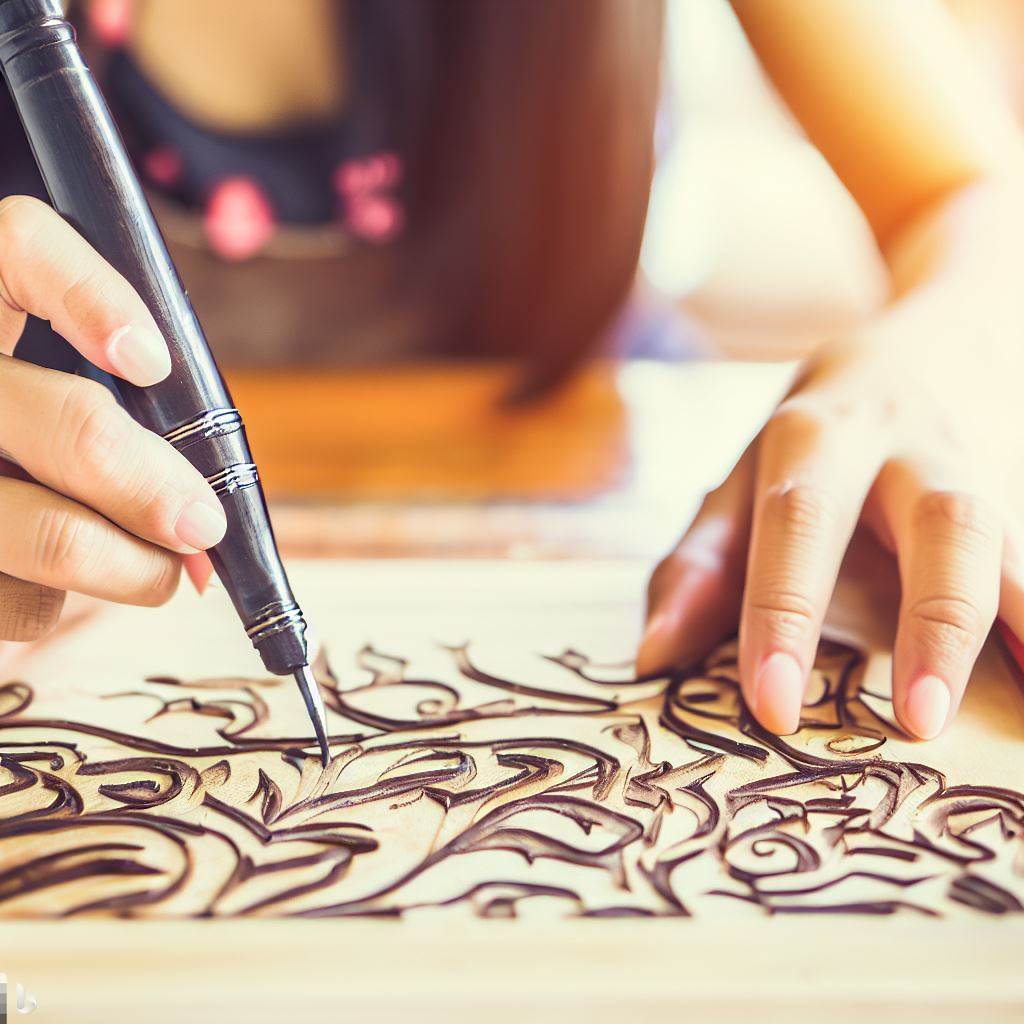
To get started with pyrography, you will need a few essential tools and supplies. The most important tool is a wood burning tool, which consists of a heated metal tip that is used to create the desired designs on the wood surface. Additionally, you will need different types of wood, sandpaper for preparing the wood surface, stencils or patterns for creating intricate designs, and a set of protective gloves to ensure your safety during the wood burning process.
Step-by-Step Guide to Wood Burning
Wood burning involves a series of steps to achieve the desired design. First, you need to select a piece of wood that suits your project. Different types of wood offer various textures and grain patterns, which can significantly impact the final result. Next, you need to prepare the wood surface by sanding it to ensure smoothness and remove any imperfections.
Once the wood is ready, you can transfer your design onto the surface using tracing paper or freehand drawing. Afterward, heat up your wood burning tool according to the manufacturer’s instructions and begin carefully burning along the drawn lines. Take your time, as wood burning requires patience and precision. Finally, you can add finishing touches to your artwork by staining or sealing the wood for a polished look.
Exploring Different Pyrography Designs and Patterns
Popular Design Ideas for Beginners
For beginners, it’s important to start with simpler designs to build your skills and gain confidence. Popular design ideas for beginners include simple geometric shapes, nature-inspired motifs like leaves and flowers, and basic patterns such as dots, lines, and hatching. These designs allow you to practice different techniques and familiarize yourself with the wood burning tool.
Creating Unique Designs on Wood Slices
If you’re looking to add a rustic or natural touch to your pyrography projects, consider working on wood slices. Wood slices are cross-sections of tree trunks or branches that can be transformed into decorative pieces. You can create unique designs, such as landscape scenes, animal portraits, or personalized messages, on these organic and charming surfaces.
Using Patterns and Stencils in Pyrography
If you’re not confident in your freehand drawing skills, patterns and stencils can be a valuable tool in pyrography. These pre-designed templates allow you to create intricate and precise designs with ease. Whether you’re working on a specific theme or simply looking for inspiration, patterns and stencils provide a great starting point for your wood burning projects.
Getting Started with Pyrography: Tips for Beginners
Choosing the Right Kit for Beginners
When starting with pyrography, it’s essential to choose the right kit that suits your skill level and needs. Beginner kits usually come with a basic wood burning tool, a variety of interchangeable tips, and some wood pieces to get you started. These kits are designed to help beginners learn the craft and explore different techniques without overwhelming them with too many options.
Preparing the Wood Surface for Burning
Preparing the wood surface before starting the burning process is crucial for achieving clean and crisp results. Start by sanding the wood to remove any roughness or imperfections. This step helps ensure that the wood burns evenly and smoothly. Additionally, consider applying a thin layer of water-based sealant or wood stain to enhance the wood’s natural color and protect it from damage.
Mastering the Basic Techniques of Pyrography
Mastering the basic techniques of pyrography is essential for creating beautiful and precise designs. Start by practicing different types of strokes, such as straight lines, curves, and shading, to develop better control over the wood burning tool. Experiment with different pressure, heat settings, and tip shapes to achieve various effects on the wood. With practice and patience, you’ll gradually improve your skills and be able to create more intricate and detailed pieces.
Exploring Different Types of Wood for Pyrography
The Ideal Wood for Pyrography Projects
Choosing the right type of wood is crucial for the success of your pyrography projects. While virtually any type of wood can be used, certain woods are more ideal due to their texture, grain pattern, and ability to hold the burned designs. Basswood, birch, and pine are popular choices among pyrography enthusiasts due to their smooth surface and minimal grain patterns.
Understanding the Importance of Wood Texture
Wood texture plays a significant role in the final outcome of your pyrography projects. Smooth and fine-grained woods, such as maple, offer a clean and consistent burning surface, perfect for detailed designs. On the other hand, woods with a more pronounced grain pattern, such as oak or walnut, can add a rustic and organic feel to your artwork. Consider experimenting with different wood textures to achieve the desired effect in your pyrography pieces.
Recommended Wood Species for Different Designs
Each wood species has its own characteristics that make it suitable for specific design styles. For intricate and delicate designs, consider using lighter woods like basswood or birch. These woods have tight grain patterns and are easier to burn with fine details. If you’re aiming for bold and dramatic designs, try using darker woods like walnut or mahogany. The rich color and strong grain of these woods can add depth and contrast to your pyrography artwork.
Taking Your Pyrography Skills to the Next Level
Advanced Pyrography Techniques and Projects
Once you have mastered the basic techniques of pyrography, you can challenge yourself by exploring advanced techniques and projects. Advanced pyrography techniques include shading, stippling, and layering, which allow you to create more realistic and intricate designs. You can also venture into pyrography on other materials like leather or gourds to expand your creative possibilities.
Creating Artistic Pyrography Pieces
Pyrography offers endless opportunities for artistic expression. You can create one-of-a-kind pieces of art by combining wood burning with other artistic techniques, such as painting or carving. By incorporating different mediums, you can add color, texture, and dimension to your pyrography pieces, making them truly unique and captivating.
Joining a Pyrography Book Club for Inspiration
If you’re looking for ongoing inspiration and guidance in your pyrography journey, consider joining a pyrography book club. These clubs provide a platform for pyrography enthusiasts to connect, share their work, and learn from each other. Reading books and magazines dedicated to pyrography can also offer valuable insights, tips, and project ideas to help you continuously improve your skills.
Pyrography, with its rich history and timeless appeal, is a captivating art form that allows you to unleash your creativity and create stunning pieces of wood art. Whether you’re a beginner or an experienced artist, the possibilities and enjoyment of pyrography are virtually endless. So, gather your tools, select your wood, and let the flames of inspiration ignite your passion for this ancient craft.