Handmade Jewelry Using Electronic Components: Buzzing Steampunk Designs
Introduction
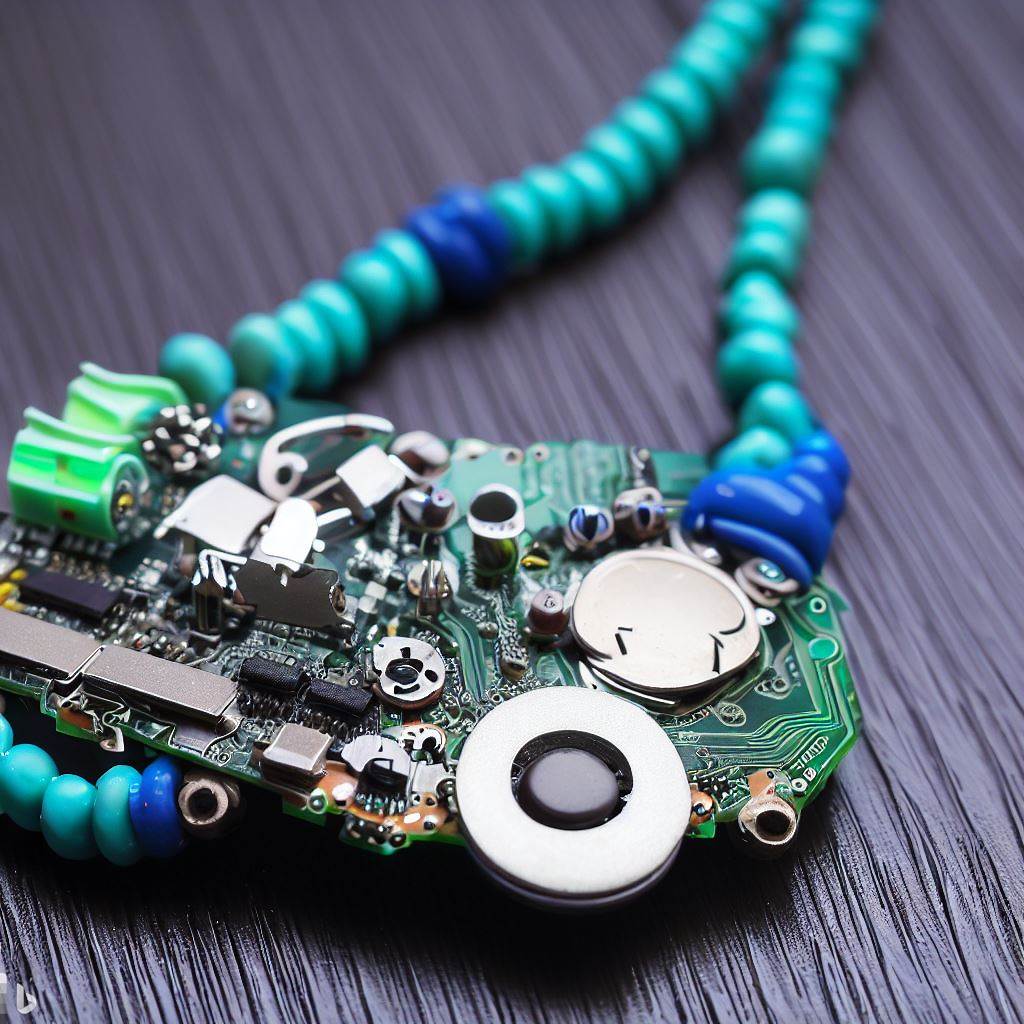
Electronic components from circuits, switches, and hobby electronics contain a treasure trove of materials for creating buzzing, beeping steampunk and tech-inspired jewelry designs. With simple soldering and wiring methods, transformers, circuits, lights, and switches transform into interactive statement pieces.
This guide covers ways to incorporate components like miniature motors, speakers, batteries, LED lights, and switches into handmade jewelry. Learn how electronic principles enable jewelry that responds to touch, sound, and movement through clever engineering. Explore project ideas for making mesmerizing interactive electronic jewelry.
Benefits of Using Electronics in Jewelry Making
Electronic parts offer unique advantages for creating interactive jewelry:
- Allow making kinetic pieces that respond and move
- Provide auditory interest through buzzers, beeps, and music
- Enable illumination using LED lights in imaginative ways
- Result in futuristic cyberpunk and steampunk styles
- Offer lots of affordable reusable material sourced from electronics
- Teach basic circuitry, soldering, and wiring skills
- Allow interactive elements and special effects worn on the body
- Attract interest and attention for wearable conversations starters
Helpful Tools and Supplies for Electronic Jewelry Making
Specialized tools assist manipulating and connecting electronic components:
- Soldering iron and solder – Joins metal component leads electronically
- Snips – Trims electronic leads and wires cleanly and closely
- Wire strippers – Quickly removes plastic coating from wire ends
- Conductive glue – Alternatively bonds components without soldering
- Magnifying glasses – Views small markings and enables precision
- Epoxy glue – Attaches electronic elements within jewelry sturdily
- Mini screwdrivers – Manipulate tiny screws on micro components
- Insulated wire – Links electronic elements securely into circuits
- Battery holders – Securely powers electronic jewelry without direct soldering
Key Electronic Components for Building Jewelry Circuits
Stock these parts for making interactive electronic jewelry:
- Coin cell batteries – Tiny discreet batteries fitting into pendants
- Micro switches – Activate circuits through toggles or motion
- Momentary switches – Turn circuits on temporarily while pressed
- Vibration motors – Spin propellers or provide haptic feedback
- Mini speakers – Add sound effects or voice recordings
- Micro servos – Enable articulating elements to move
- Integrated circuits – Contain predesigned circuits like timers
- LED lights – Illuminate jewelry designs in any color
- Photo resistors – Change resistance in response to light
- Wire coil transformers – Induce currents and boost power
Techniques for Incorporating Electronics in Jewelry
Follow these methods for jewelry that reacts:
- Solder component legs to insulated connecting wires to create a secure circuit
- Attach a small cell battery to wires using conductive tape or battery holder instead of direct soldering
- Activate lights, motors, or sound FX through hidden magnetic reed switches
- Use wire coil transformers to boost weak currents from watch batteries to produce dramatic effects
- Control multiple outputs using integrated circuits like 555 timers wired to sequence properly
- Combine conductive fabrics like steel mesh with circuits to create interactive surfaces
- Encase completed circuits in resin or tubes to insulate and protect delicate connections
- Hide circuits behind decorative covers allowing buttons or controls to protrude
- Design mechanisms like hinges or pivots for wired elements to articulate and move
Inspiring Examples of Interactive Electronic Jewelry
Looking for design ideas? Take inspiration from these electronic jewelry projects:
- Rings and bracelets with concealed patterned LEDs lighting up when touched
- Hinged lockets opening to reveal a voice recording mechanism inside
- Steampunk necklaces with mini electromagnetic buzzers providing tactile feedback
- Earrings with flapping wire-frame wings animated through micro servos
- Brooches playing music box melodies activated by a hidden button press
- Pendants with sparkling kaleidoscope interiors rotating using a tiny motor
- Charm bracelets with battery powered animated charms like wagging dogs or waving cats
- Raindrop bib necklaces illuminated by conductive thread circuits touched to the body
- Wire wrapped crystals glowing with colorful LEDs powered by small coin cell batteries
- Fountain pen charms with cartridge tips containing concealed vibrating motors
Tips for Advancing Your Electronic Jewelry Skills
Use these techniques to take interactive electronic jewelry to the next level:
- Seek out micro components from hobby electronics stores for endless special effects options in miniature
- Follow circuit diagrams when wiring multiple interactive components like LEDs, motors, and switches
- Use colors, patterns, or resistor codes to keep track of different wire connections
- Test frequently while slowly constructing circuits to identify faults early before final assembly
- Power LEDs, motors, and buzzers using amplified electromagnetic fields rather than direct excessive current
- Switch from solder to stronger conductive glues and tapes for less temperature-sensitive components
- Apply clear conformal coatings over completed soldered boards to insulate connections from shorting
- Sand plastic electronic housings to roughen surfaces before gluing so epoxy bonds tightly
Safety Precautions for Electronic Jewelry Making
Follow these tips for safely working with electronics:
- Wear safety glasses soldering as hot bits of wire can fling off
- Return capacitors to discharged state before soldering to avoid shocks
- Unplug irons when not in use rather than risk burning unattended
- Avoid contact with battery leads or placing cells in pockets which may short
- Check polarity of battery holders before connecting to avoid wiring backwards
- Heed manufacturer warnings and specifications for micro components
- Power jewelry using button cell or rechargeable batteries to minimize voltage
- Keep resin off coin cell tabs to avoid insulating battery connections
- Secure wires tightly with adhesives rather than risk disconnected leads and shorts
Conclusion
Integrating lights, motors, and circuits enables handmade jewelry with engaging interactive capabilities. While requiring some electronics knowledge, basic components open many creative possibilities.
Use micro switches, vibrators, and wires to give your steampunk jewelry articulating wings, buzzing textures, or glowing lights. Craft brooches playing melodies or necklaces illuminating when touched for magical effects.
Let discarded electronic components destined for e-waste inspire innovation. Repurpose circuits into kinetic wearable art that delights with sound, motion, and light.